
Plan, permit, run utilities, build a durable base, then finish smart.
If you wonder how do you build an outdoor kitchen, you are in the right place. I design and build them for real clients.
This guide shows how do you build an outdoor kitchen step by step, with exact tips, safe methods, and lessons learned in the field. Read on to see how do you build an outdoor kitchen that looks great, cooks well, and lasts.

Start With a Solid Plan
A clear plan saves time, money, and stress. When people ask how do you build an outdoor kitchen, I start with goals, space, and budget. Define how you will cook, host, and clean up. Decide what matters most before you buy a single part.
Follow these steps first:
- List your must-have items. Grill, sink, fridge, smoker, or pizza oven.
- Measure the site. Note sun, wind, slope, and views.
- Check local codes. Most areas need permits for gas, water, or electric.
- Set a firm budget and a 10 percent reserve for surprises.
- Choose placement. Keep it close to the house for ease, but not too close to windows.
Practical tip from my jobs:
- Place the kitchen within 15 to 20 feet of the indoor kitchen. It cuts trips.
- Keep smoke downwind from seating and doors.

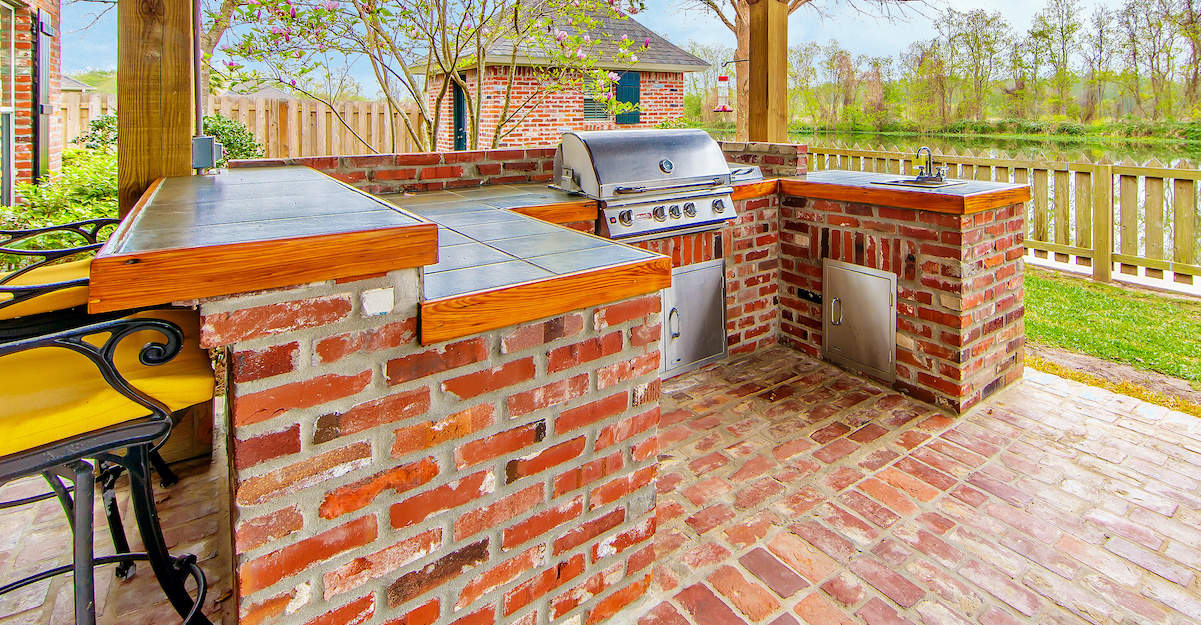
Design and Layout That Work
Form follows function. When clients ask how do you build an outdoor kitchen, I map zones first. You need four zones: hot, cold, wet, and dry. Good flow makes every cookout calm and safe.
Use these layout rules:
- Keep the hot zone away from flammable walls and posts.
- Leave 12 inches of landing space on each side of the grill.
- Place the sink near prep space for easy wash up.
- Put the fridge at the edge for quick drink grabs.
- Allow safe paths. Aim for 36 inches of clear walkway.
Popular layouts:
- Straight run for tight patios.
- L-shape for two cooks and more prep space.
- U-shape or island for large groups.
If you wonder how do you build an outdoor kitchen with shade, add a pergola, roof, or umbrella. Leave safe clearances for heat and venting.

Utilities, Codes, and Safety
This part is not a guess. It is vital. A full plan for power, gas, water, and drainage is key when you ask how do you build an outdoor kitchen.
Follow core rules used by pros:
- Electrical. Use outdoor rated boxes, GFCI outlets, and in-use covers. Put outlets every 6 to 8 feet along counters. Use dedicated 20 amp circuits for fridges and ice makers if needed.
- Gas. Use licensed pros for natural gas or propane. Install a shutoff valve that is easy to reach. Add vent panels in doors for propane, which is heavier than air.
- Water. Use a frost proof faucet and proper traps. Check if an air admittance valve is allowed. Keep the sink line short to limit heat loss and freezing risk.
- Drainage. Slope the patio away from the house at about 1/4 inch per foot. Add a channel drain if water pools.
- Ventilation and clearances. Follow the grill manual for safe gaps to walls. Use a vent hood for covered spaces. Fireproof any nearby surfaces.
Pro tip:
- Bond and ground metal parts when required. It protects people and gear.

Materials That Last Outdoors
Your kitchen fights sun, rain, and heat. Choose parts that do not rust, fade, or swell. The right picks matter as much as any tool when you ask how do you build an outdoor kitchen.
Good choices:
- Frame. Concrete block, poured concrete, or galvanized steel studs.
- Sheathing. Cement board. Do not use drywall outdoors.
- Finish. Stone veneer, brick, tile, or stucco. Use polymer modified mortar.
- Countertops. Granite, porcelain slab, sintered stone, or sealed concrete. Avoid standard indoor quartz in full sun.
- Cabinets. 304 or 316 stainless, marine grade polymer, or masonry boxes.
- Flooring. Porcelain pavers, textured concrete, or sealed natural stone with grip.
- Fasteners. Stainless or hot dipped galvanized screws and anchors.
Lessons learned:
- I seal stone tops once or twice a year. It keeps stains out.
- I avoid dark tops in hot sun. They can get too hot to touch.
Step-by-Step Build Process
Clients often ask how do you build an outdoor kitchen in clear steps. Here is the process I use on site.
- Permits and layout
- Pull permits for gas, water, and power.
- Mark the footprint with paint and strings.
- Foundation
- Prepare a 4 inch concrete slab with mesh or rebar, or
- Build a compacted base of gravel and sand for pavers.
- Frame and rough-in
- Build the frame with concrete block or steel studs.
- Run electric in conduit. Pull the right gauge wire.
- Run gas lines with shutoffs. Pressure test the lines.
- Rough in water and drain lines with proper slope.
- Sheathing and waterproofing
- Install cement board on frames.
- Add a waterproofing membrane where needed.
- Finish surfaces
- Set stone veneer or brick with exterior mortar.
- Set tile with exterior thinset and grout.
- Install countertops. Shim to level. Seal as needed.
- Venting and safety parts
- Cut and fit vent panels for gas.
- Install backsplash shields near hot zones.
- Install appliances
- Place the grill, side burner, and fridge.
- Use manufacturer trim kits. Check clearances and airflow.
- Final connections
- Hook up electric, gas, and water.
- Test every line, outlet, burner, and drain.
- Punch list and cure
- Seal stone and grout.
- Clean burners and season grates.
- Let any concrete cure as directed.
:max_bytes(150000):strip_icc()/thecowspot-5564e56642074110b761f8dbecb3b3ba.jpg)
Choosing Appliances and Features
Smart picks make cooking fun and smooth. When people ask how do you build an outdoor kitchen that fits real life, I match tools to habits.
Key items to consider:
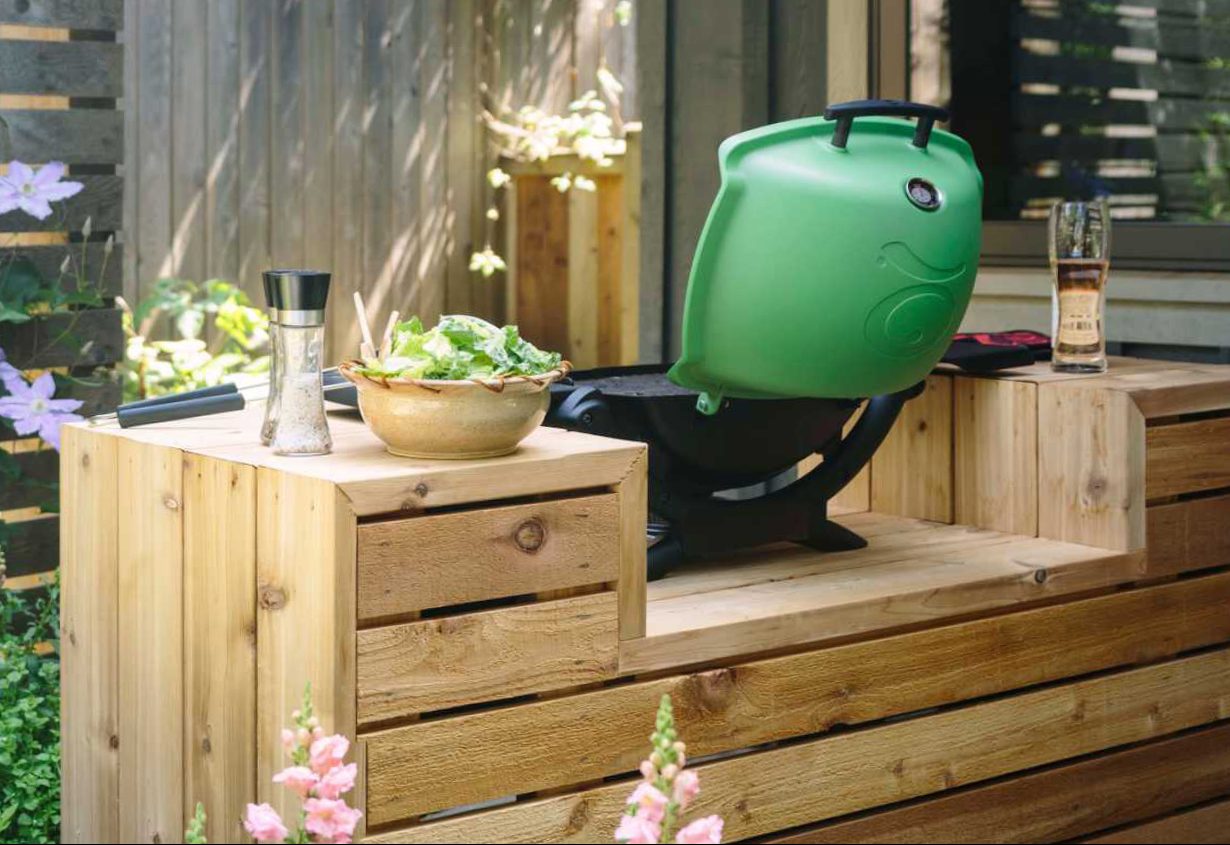
- Grill. Pick fuel type and size. 32 to 42 inches fits most homes.
- Smoker or combo unit. Add flavor and range.
- Side burner or power burner. Boil, sear, and simmer outside.
- Refrigerator and ice maker. Choose outdoor rated models only.
- Sink and faucet. Use stainless and a deep basin for pans.
- Storage. Use weatherproof doors and drawers with gaskets.
- Pizza oven. Plan for weight, venting, and heat shield.
- Warming drawer or heat lamps. Hold temp for guests.
- Lighting. Add task, ambient, and step lights.
Safety note:
- Keep a Class B fire extinguisher nearby.
- Mount a simple first aid kit inside a cabinet.
Budget, Timeline, and DIY vs Pro
How do you build an outdoor kitchen on time and on budget? Set clear ranges and choose where to DIY and where to hire.
Typical cost ranges in my markets:
- Basic island with grill and counter: 5,000 to 12,000 dollars.
- Mid tier L with sink, fridge, and stone: 12,000 to 25,000 dollars.
- Premium with roof, pizza oven, and heaters: 25,000 to 60,000+ dollars.
Timeframes:
- Design and permits: 2 to 6 weeks.
- Build: 1 to 4 weeks, based on scope and weather.
Where to DIY:
- Design sketches, layout, demo, and paint.
- Setting pavers or building simple block walls.
Where to hire:
- Gas and electrical work.
- Complex masonry, large slabs, and structural roofs.
Money savers I use:
- Choose a stock grill size so trim kits fit.
- Keep the kitchen near existing lines.
- Use porcelain for counters and floors. It is tough and low care.
Maintenance and Seasonal Care
A little care goes a long way. If you ask how do you build an outdoor kitchen that stays great, plan simple upkeep from day one.
Easy routine:
- Wipe counters after each use. Use mild soap and water.
- Cover the grill after it cools.
- Clean burners and check for clogs each month.
- Inspect caulk lines and seals every season.
Seasonal steps:
- Reseal stone and concrete as needed.
- Winterize water lines. Drain and blow out if you freeze.
- Oil stainless steel to reduce tea stains and salt marks.
- Check pests. Seal gaps and add door sweeps.
Common Mistakes to Avoid
I see the same traps often. Keep these in mind when you ask how do you build an outdoor kitchen the right way.
Top mistakes:
- Skipping permits and then failing inspection later.
- Using indoor grade gear outside.
- Placing the grill too close to siding or posts.
- Forgetting vent panels in propane cabinets.
- Ignoring drainage. Water will find your weak spot.
- Choosing glossy, slick floor tile that gets slippery.
- Forgetting landing space near the grill and sink.
Fixes I use:
- Create a one page spec sheet for all clearances.
- Test run all burners and outlets before final stonework.
Real Project Lessons From the Field
Clients love real stories. These notes will help if you ask how do you build an outdoor kitchen that avoids pain.
Case 1: Wind shift surprise
- The grill faced the evening breeze. Smoke blew into the seating area.
- We rotated the layout 90 degrees and added a back guard. Problem solved.
Case 2: Sun-baked tops
- A black granite top hit 150 degrees at noon.
- We swapped to a light porcelain slab. Heat dropped a lot, and care got easier.
Case 3: Drain line freeze
- A long, shallow drain line froze in winter.
- We re-pitched the line and added a cleanout. No more backups.
Case 4: Propane safety vents
- Client kit had no cabinet vents.
- We added lower and upper vents. Gas now has a safe escape path.
Frequently Asked Questions of how do you build an outdoor kitchen
How much space do I need?
Most small layouts fit in 8 to 10 feet of run. Add more room if you want a sink, fridge, and seating.
Do I need a permit?
Yes, for gas, electric, and water in most areas. Check with your local office before you start.
Can I put an outdoor kitchen under a roof?
Yes, but add a vent hood and follow grill clearance rules. Use noncombustible surfaces near heat.
What countertop is best outdoors?
Granite, porcelain, sintered stone, and sealed concrete hold up well. Avoid indoor quartz in direct sun.
How long does it take to build?
Simple builds take one to two weeks after permits. Complex jobs with roofs can take a month or more.
Conclusion
You now know how to plan, design, and build a safe, durable, and beautiful setup. The answer to how do you build an outdoor kitchen is simple at heart: plan well, follow codes, choose tough materials, and build in clean steps. Start small if you must, but start smart.
Set your budget, sketch your zones, and make a call to confirm permits today. When you are ready, use these steps to guide each move. Share your questions or your own build story, and subscribe for more hands-on outdoor projects.