
Design, permit, pour a footing, build firebox, add chimney, then finish.
If you want to learn how to build an outdoor fireplace that looks great and lasts, you are in the right place. I have built and fixed many backyard fireplaces over the years. This guide blends field-tested steps with code-aware advice.
You will get clear plans, easy steps, and the key rules that make how to build an outdoor fireplace safe, warm, and worth your time.

Planning, permits, and codes for how to build an outdoor fireplace
Good planning is the strongest part of how to build an outdoor fireplace. Start with local rules. Most places need a permit for a fixed fireplace. Call your building office. Ask about setbacks, gas rules, and spark control.
Follow safe clearances. Keep the unit away from fences, sheds, and trees. Many codes want at least 10 feet of space from combustibles. Add more space if winds are strong.
Here is a quick pre-build checklist:
- Check utility lines. Call before you dig.
- Confirm footing depth. Go below frost line if your area freezes.
- Plan drainage. Keep water away from the base.
- Pick fuel type. Rules differ for gas and wood-burning units.
I learned this the hard way on a tight city lot. A client wanted the fireplace near a wood fence. We moved it 6 feet and added a spark arrestor. The inspector passed it on the first visit.

Choose fuel type and design that fit your yard
Choose how you will burn fuel first. It shapes the whole build.
Wood-burning:
- Classic sound and flame.
- Needs a larger chimney and spark screen.
- More ash and smoke. Store dry wood.
Gas (natural gas or propane):
- Clean burn and fast start.
- Needs a licensed gas line and shutoff.
- Smaller flue needs. Less smoke, less soot.
Pick a design that fits your space:
- Freestanding with chimney for a focal point.
- See-through unit to divide zones.
- Add side wood boxes and a seat wall for comfort.
In my own yard, I chose gas. We host weeknight dinners. Clean starts and no ash were worth it. If you love the crackle, wood is great. Just plan for a stronger chimney.

Tools and materials checklist
You do not need exotic tools to learn how to build an outdoor fireplace. You do need the right mix of masonry gear and safety items.
Tools:
- Shovel, wheelbarrow, and tamp
- Level, square, and tape
- Mason’s line and stakes
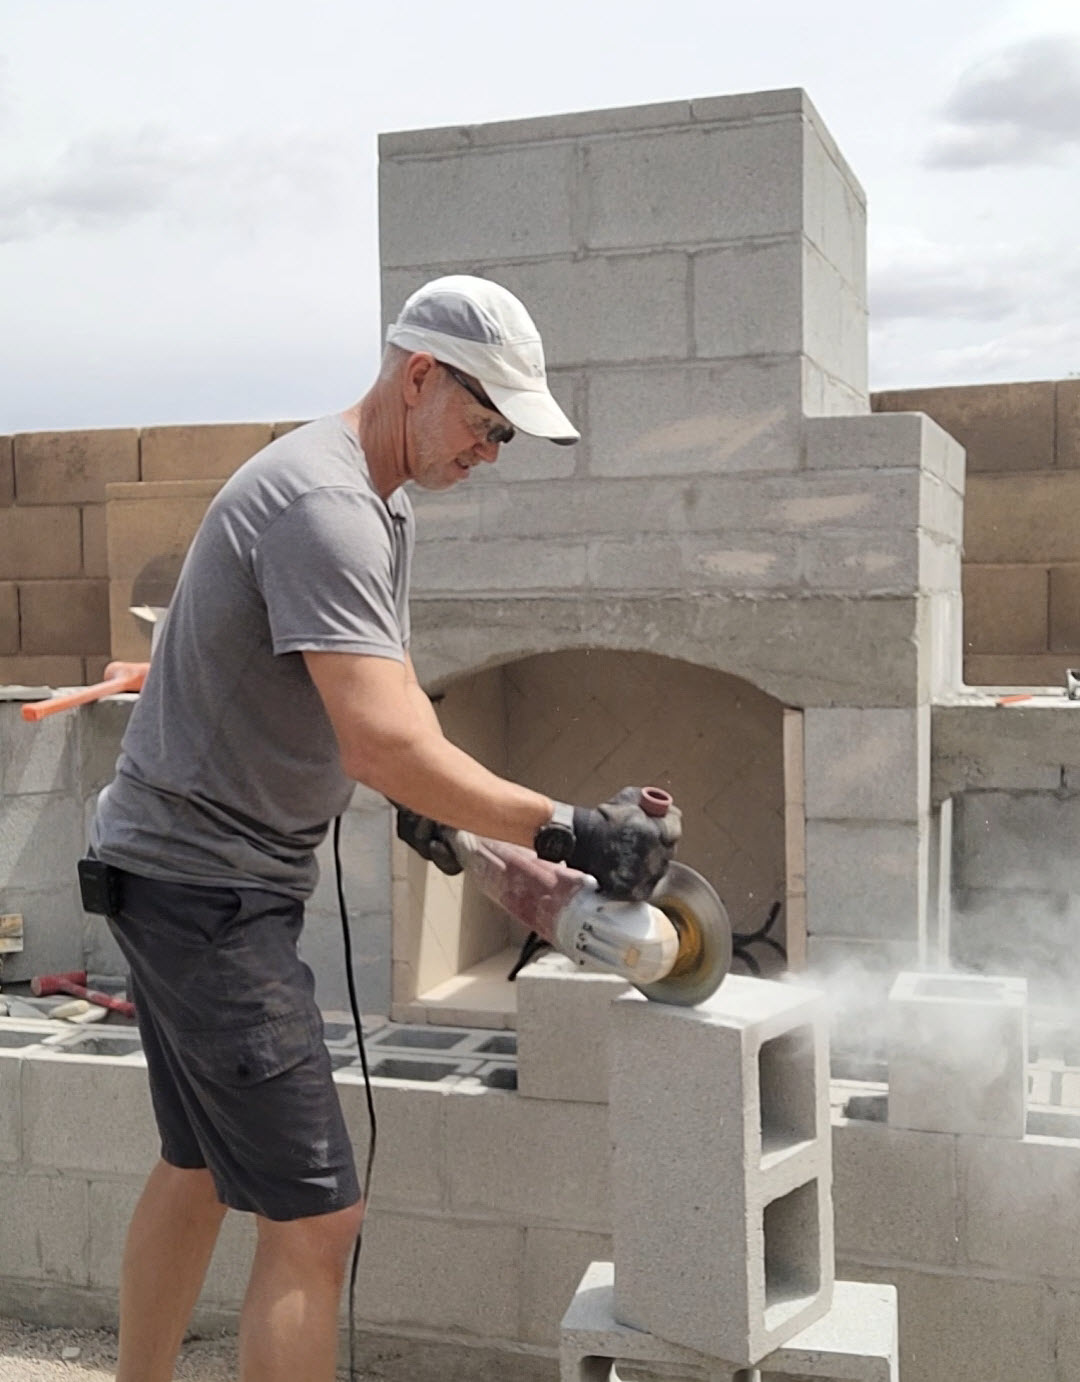
- Angle grinder with diamond blade
- Masonry saw (rent if needed)
- Mixing tubs or a mixer
- Trowels, jointer, and pointing tools
- Rubber mallet and cold chisel
- PPE: gloves, glasses, mask, and ear protection
Materials:
- Concrete mix and rebar
- Gravel base (3/4 inch crushed)
- Concrete blocks or CMU
- Firebrick and high-temp refractory mortar
- Masonry mortar (Type S for block, polymer-modified for veneer)
- Flue liner or metal flue system
- Spark arrestor and chimney cap
- Stone, brick, or stucco veneer
- Waterproofing masonry sealer
- Drip edge or metal flashing for cap
- Gas line parts if using gas (by a licensed pro)

Site selection and foundation: start right
The base is the backbone of how to build an outdoor fireplace. A poor base will crack and lean. Pick a flat zone with room to sit and move. Think about wind. Place the opening where smoke will blow away from seating.
Build a strong footing:
- Excavate to below frost depth where needed.
- Add 4 to 6 inches of compacted gravel.
- Form a slab that extends at least 6 inches beyond the walls.
- Use rebar grid at mid-depth for strength.
On clay soil, I widen footings by 6 inches and thicken to 8 inches. That small change stops most settlement. It saved one of my early builds during a heavy spring thaw.
Step-by-step: how to build an outdoor fireplace
Follow these steps to keep the build clean and safe.
- Layout and mark
- Spray paint the footprint plus extra for veneer.
- Square the corners. Check diagonal measurements.
- Excavate and pour footing
- Dig to the proper depth.
- Add gravel and compact well.
- Set forms and rebar.
- Pour concrete and level. Cure at least 48 hours.
- Build the block core
- Dry-lay the first course. Then set in mortar.
- Keep courses level and plumb.
- Leave spaces for wood boxes or gas lines if planned.
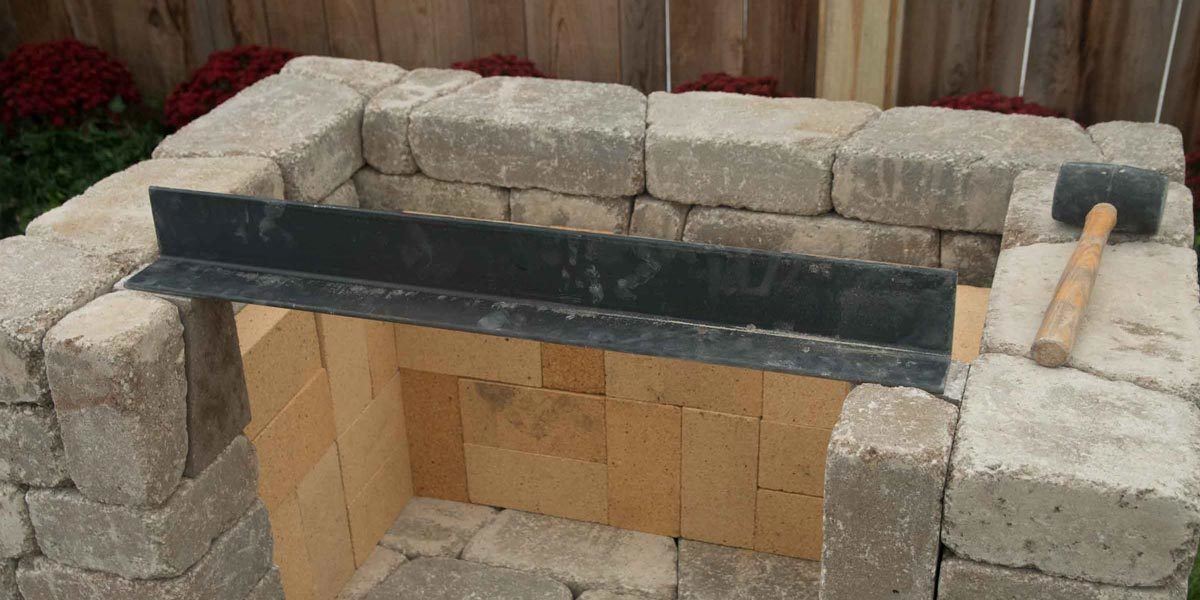
- Form the firebox with firebrick
- Line the firebox with firebrick on all sides and floor.
- Use refractory mortar for all firebrick joints.
- Aim for a firebox depth of about 20 to 22 inches for a large opening.
- Shape the throat and smoke chamber
- Taper the area above the firebox to the flue.
- Leave a smooth path for smoke. No sharp steps.
- Set the flue liners
- Size the flue to the opening. A common rule is the flue area is about one tenth of the opening area for round flues.
- Stack liners plumb. Butter joints with refractory mortar.
- Build the chimney
- Continue the block or masonry shell around the flue.
- Keep it straight and secure. Anchor with ties as needed.
- Add a chimney cap and spark arrestor
- A metal screen reduces embers.
- A stone or cast cap sheds water. Add a drip edge.
- Install veneer and hearth
- Attach lath if needed. Apply scratch coat.
- Set stone or brick veneer. Keep joints tight and even.
- Build a non-combustible hearth at least 16 to 20 inches deep.
- Cure and seal
- Let mortar cure as directed.
- Apply masonry sealer to protect from water.
- Test fire
- Start with small fires for a few days.
- Check draft. Watch for smoke rollout or leaks.
Firebox, flue, and chimney draft explained
Draft is the engine of your fire. Warm air rises up the chimney and pulls fresh air through the firebox. A clean path makes a clean burn.
Get proportions right:
- Fireplace opening: a common size is 36 to 42 inches wide and 28 to 32 inches tall for a family space.
- Firebox depth: about 20 to 22 inches for larger openings. Go deeper in windy spots.
- Flue area: aim for about one tenth of the opening area for round flues. For square or rectangular flues, you may need a bit more area.
- Chimney height: taller helps draft. Many pros go at least 3 to 4 feet above the opening. If near a wall or roof, follow local height rules.
Reduce turbulence:
- Smooth the smoke chamber.
- Use a throat damper or top damper on wood units.
- Add a wind-resistant cap. This helps in gusty yards.
If smoke puffs out at start, warm the flue. I roll a small newspaper torch and hold it near the throat for 30 seconds. It primes the draft fast.
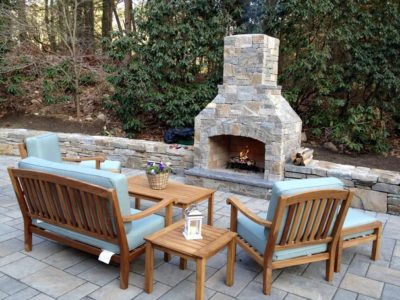
Finishes, weatherproofing, and seating
The finish is where how to build an outdoor fireplace meets style. Stone gives a timeless look. Brick feels classic. Stucco is clean and budget friendly.
Build for weather:
- Use polymer-modified mortar for veneer.
- Add a slight slope to ledges and caps to shed water.
- Seal the exterior with a breathable masonry sealer.
- Include a drip edge to push water away from walls.
Plan comfort:
- Add a seat wall 18 inches high and 16 to 18 inches deep.
- Place seating 6 to 8 feet from the opening for heat and safety.
- Add low-voltage lights under caps for evening use.

Safety, maintenance, and seasonal care
Safety keeps the joy in your fire nights. Keep all furniture and plants clear of the opening. Use a mesh screen when burning wood. Keep a bucket of sand or an extinguisher nearby.
Ongoing care:
- Empty ash in a metal bin after it cools for 24 hours.
- Clean soot and check the flue each season.
- Re-seal exterior every 2 to 3 years.
- Cover the opening in long wet spells to reduce moisture.
For gas units, test the shutoff twice a year. Have a licensed pro service burners and check for leaks.
Budget, timeline, and project management
It helps to price how to build an outdoor fireplace before you start. Costs vary by size, finish, and fuel. A small DIY block-and-stone wood unit may start near the low thousands. Large custom stone builds can run many times that. Gas adds cost for a safe line and valve.
Plan time as well:
- Design and permits: 1 to 3 weeks, based on your city.
- Site work and footing: 2 to 4 days including cure time.
- Masonry and flue: 4 to 8 days, more with complex veneer.
- Finishes and cure: 2 to 4 days.
Manage like a mini project:
- Order materials early. Stone lead times can slip.
- Stage materials near the site to cut carry time.
- Protect fresh work from rain and sun with tarps.
Common mistakes and how to avoid them when learning how to build an outdoor fireplace
Avoid the pain points I see most often.
- Skipping permits. This risks fines and tear-outs. Always call your building office.
- Thin or shallow footing. Go below frost and use rebar.
- Using standard mortar in the firebox. Use refractory mortar with firebrick.
- Undersized flue. Follow the opening-to-flue area rule.
- No spark arrestor. Embers can travel far in dry seasons.
- Trapped water. Add slope, drip edges, and sealer.
- Rushing the cure. Give mortar time before big fires.
Frequently Asked Questions of how to build an outdoor fireplace
Do I need a permit to build an outdoor fireplace?
Most areas require a permit for a fixed masonry fireplace. Check with your local building department before you dig.
How deep should the footing be?
Go below the local frost line if you have freezes. In warm zones, a 6 to 8 inch reinforced slab on compacted gravel is common.
What is the best mortar for the firebox?
Use high-temperature refractory mortar with firebrick. Do not use standard masonry mortar inside the firebox.
How tall should the chimney be for good draft?
Taller chimneys draft better. Many builds work well with at least 3 to 4 feet above the opening, but follow local rules and site needs.
Can I convert a wood fireplace to gas later?
Often yes, but plan for it now. Run a sleeve or conduit path and leave access for a future gas line and valve.
What stone or brick holds up best outdoors?
Dense natural stone and quality face brick handle freeze-thaw cycles well. Use the right mortar and a breathable sealer for long life.
How far should seating be from the fire?
Aim for 6 to 8 feet from the opening. This distance feels warm and stays safe.
Conclusion
You now have a clear, proven plan for how to build an outdoor fireplace. Start with rules and a solid base. Size the firebox and flue right. Finish with smart details that fight water and wind. Add steady care, and your fireplace will serve for years.
Ready to bring yours to life? Pick a spot, sketch your design, and price your materials this week. If you found this guide useful, subscribe for more build walk-throughs or leave a comment with your questions.